Edit data and create datasets you can share.
The form helps you work in detail on one entry at a time. When you want to work with multiple entries at the same time, use the grid.
TIP Click on the tabs below to see how you can use the form.
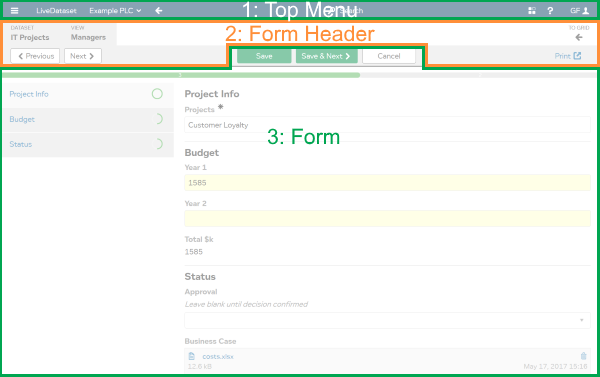
There are 3 main areas

| 1. Top Menu | Go to other datasets, get help, logout. |
| 2. Form Header | Go to other entries, print. |
| 3. Form | View, edit or delete an entry. |
Go to other entries, print.

|
DATASET
Name |
Name of the current dataset. See datasets explained. |
|
VIEW
Name |
Name of the current view. See views explained. |
|
TO GRID
|
Use grid to work with multiple entries at the same time. |
| Move back to the previous entry, or forward to the next entry. | |
| Opens a printable copy of the entry in a new browser tab. |
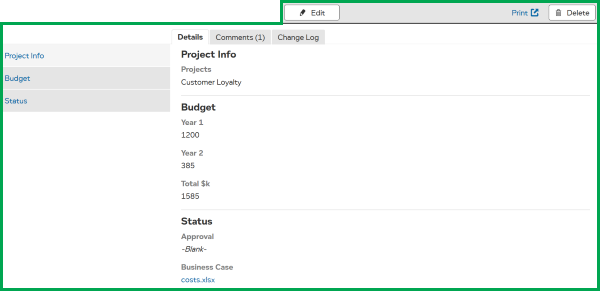
View an entry. Delete an entry.

| Edit the current entry. | |
| Delete the current entry. | |
| This tab displays the current entry vertically. | |
| Select this tab to view comments and add your own. | |
| Select this tab to see the change history for this entry. See change log. | |
| Left sidebar | Some forms have headings on the left, you can use these to ‘jump’ to each section of the form. |
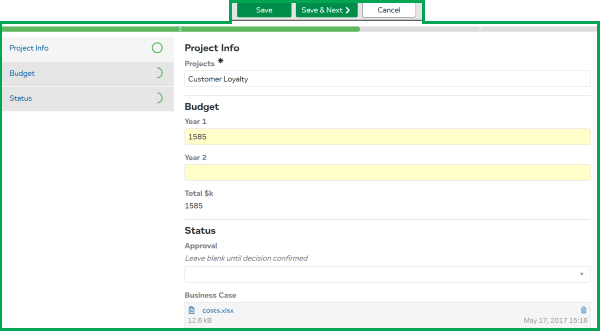
Edit an entry.

| Save your changes to this entry. | |
| Save your changes to this entry and go to the next one. | |
| Cancel unsaved changes to this entry. | |
| Progress bar | The green progress bar at the top of form shows how complete this entry is. In example shown, 3 entries are complete, 2 are blank. |
| Left sidebar | Some forms have headings on the left, you can use these to ‘jump’ to each section of the form. Green progress circles show how complete each section is. In example shown, the first section is complete and the others are 50% complete. |
| You can edit data with a white background, by entering text or selecting a value from the dropdown. | |
| The current field has a yellow background. And so do fields with unsaved data changes. |